How to insert your signature into PDFs with Lion’s Preview

Apple’s OS X Lion comes with over 250 awesome new features that truly enhance the Mac operating system. One of those features is the ability to insert your signature into PDF documents – using nothing but your iSight camera.
Before OS X Lion, if you wanted to insert your signature into a document on your Mac, you needed a tablet input device or you had to upload a picture of your signature using your scanner. Or, you could attempt to produce a signature with your mouse or trackpad, but it really never worked well.
Now it’s as easy as holding it up to a camera – why didn’t Apple think of this before?
Here’s how to do it:
Open up the Preview application that comes built-in to OS X Lion, then select ‘Preferences’ from the ‘Preview’ menu.

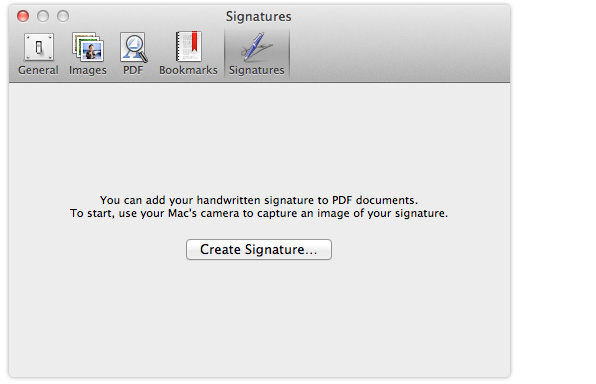
Click on the ‘Signatures’ option, and then select ‘Create Signature’.
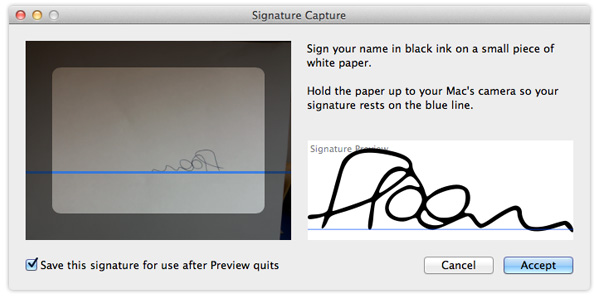
Now write your signature on a piece of plain white paper, preferably using a black pen, and as clearly as possible. Then hold it up to your iSight camera so that your signature sits on the blue line in the capture window. You may have to move it closer/further away from your iSight camera to get it just right.

Once you’re happy, click ‘Accept’ to save your signature.
Now you can use your signature to sign PDF documents that you open using the Preview application. To do this, follow the steps below:
Open up the PDF document you’d like to sign using the Preview application.

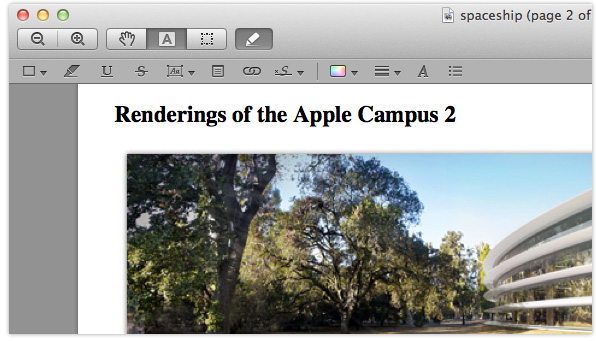
Click on the ‘Annotations’ icon that looks like a pencil, then select the ‘Signatures’ button that is labeled with an ‘S’.
Now all you have to do is insert your signature by simply clicking on the area of the document that you’d like to sign.

And it’s as simple as that. Using the iSight camera to capture your signature doesn’t sound like the most effective method, but once you’ve tried it I think you’ll agree that it works surprisingly well. Give it a try and let us know what you think!
